
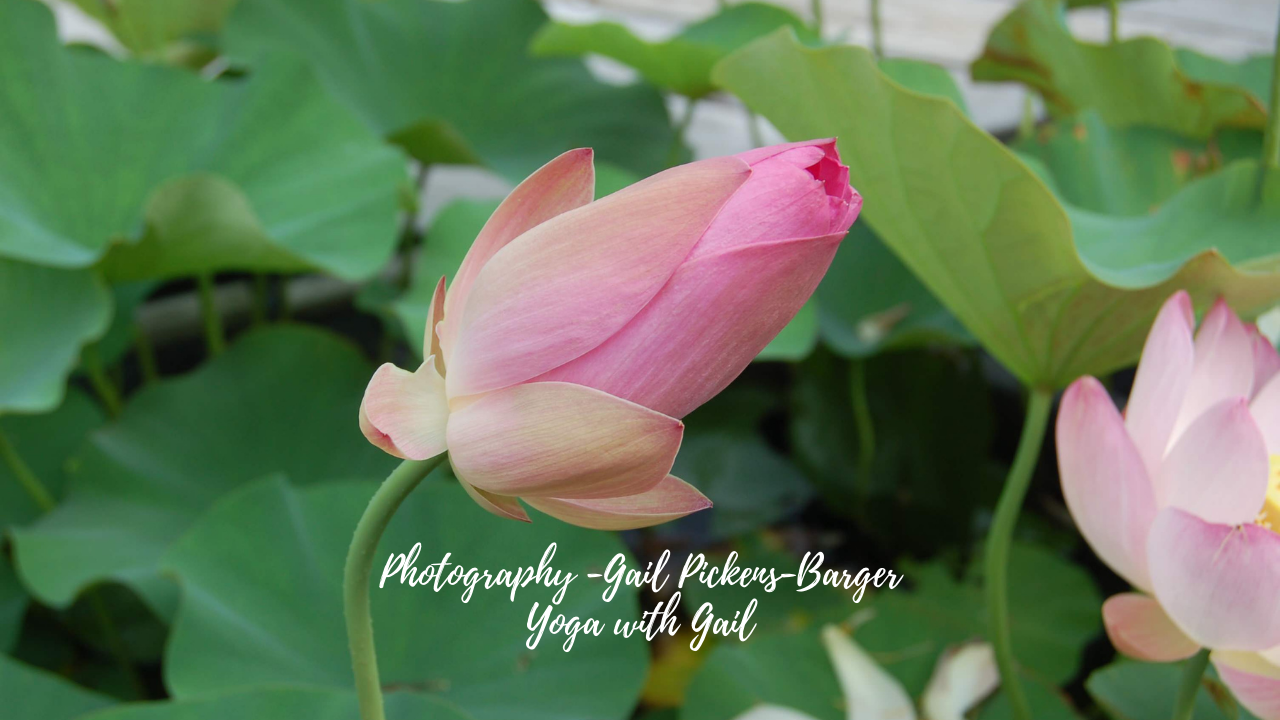
Enjoy this set of photographs that I took at the recent Pt Arthur Lotus Festival.
Meditation May I be Happy
DIY Zafu Meditation Pillows | Meditation DIY Pillows
#zafu #zazen #seatedmeditation

Gentle Yoga and Tai Chi with Gail
I Teach Easy Movement Postures and Poses to Lessen Back Pain. Gentle Yoga & Tai Chi with Gail Pickens-Barger. 409-727-3177 Southeast Texas.
Enjoy this set of photographs that I took at the recent Pt Arthur Lotus Festival.
Meditation May I be Happy
DIY Zafu Meditation Pillows | Meditation DIY Pillows
#zafu #zazen #seatedmeditation
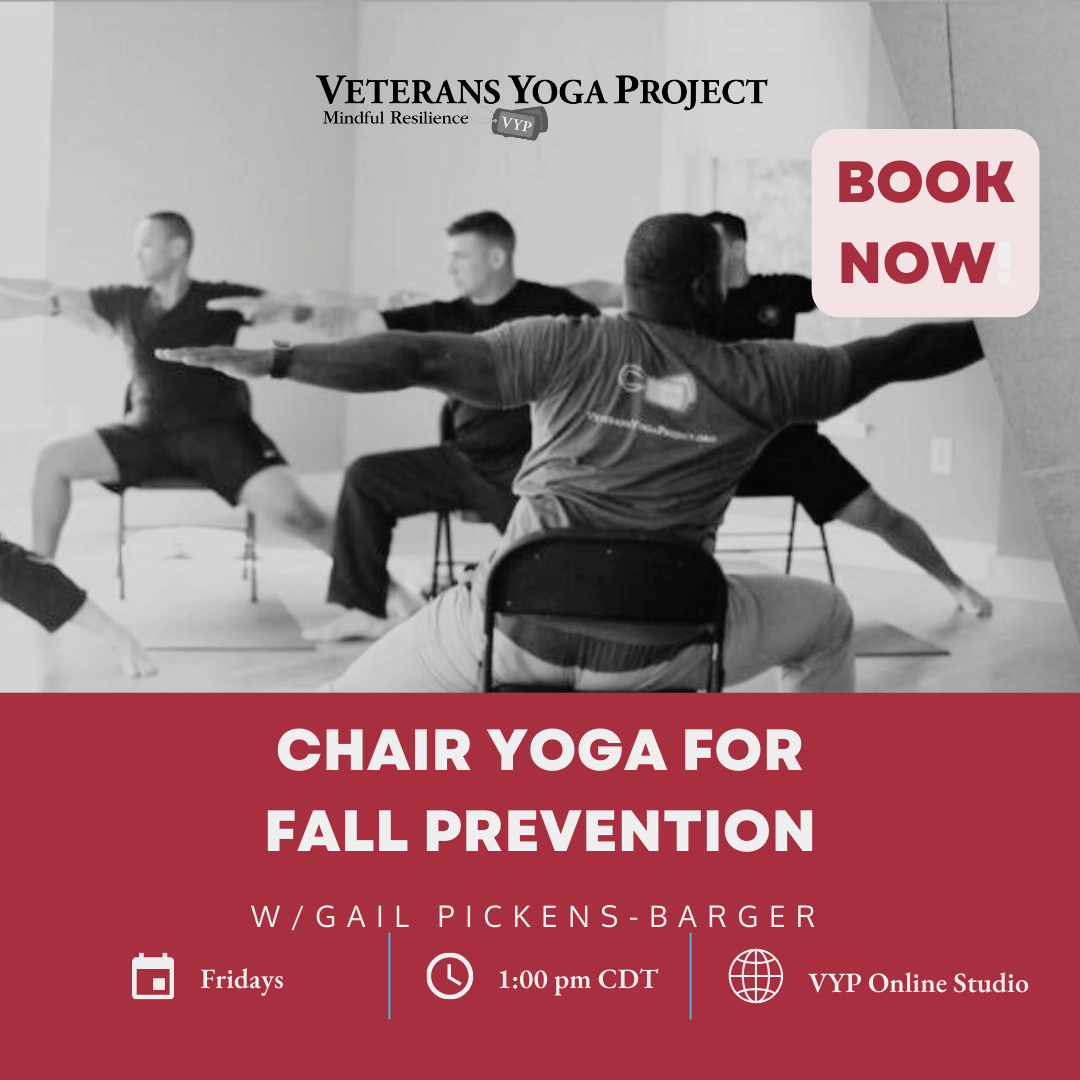
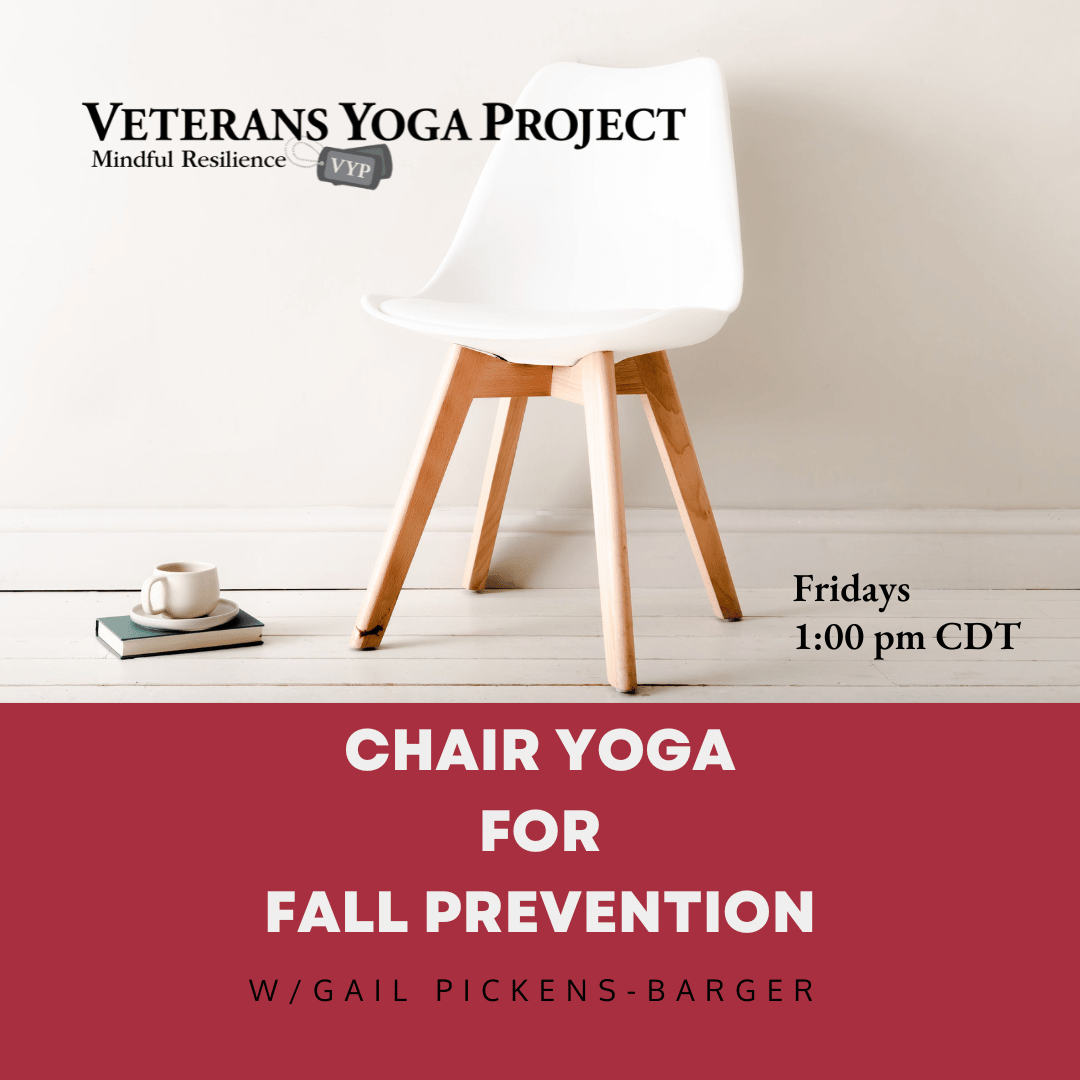
Teaching a new time slot and a new style of class. Starts on Friday, January 17, 2025. Will reside on the online studio platform for Veterans Yoga Project. Chair Yoga for Fall Prevention.
Recently Veterans Affairs, announced its partnership with Veterans Yoga Project to have VYP provide yoga, meditation, Yoga Nidra Meditation practices. The full story can be found here.
Here’s a little snippet from the article.
VA offers free online and in-person yoga classes and mindfulness training to Veterans across the nation. VA hosts these classes through a partnership with Veterans Yoga Project, Inc., which is maintained by the National Center for Healthcare Advancement and Partnerships (HAP).
The classes provide a no-cost opportunity to Veterans seeking to improve their mental, physical and emotional health through yoga and mindfulness practices.
VA and Veterans Yoga Project are working together to make more Veterans aware of the benefits of yoga while offering more classes. This partnership also provides local VA medical centers with opportunities to connect with Veterans Yoga Project instructors to provide yoga classes and mindful resilience training to Veterans, either in-person or virtually through VA-approved telehealth platforms.
“Through this partnership with Veterans Yoga Project, we are addressing top VA priorities, expanding Veteran access to care and enhancing the overall health of Veterans,” said Kimberly Pugh, health system specialist within VHA National Center for Healthcare Advancement & Partnerships. “Including yoga and mindfulness into their health care routine provides Veterans with additional tools to manage stress, improve physical health and build resilience.”
72% of Veterans saw a reduction in pain
The Veterans Yoga Project is a nonprofit organization that helps Veterans, their families and communities recover and build resilience through yoga and mindfulness training. In 2023, Veterans Yoga Project reported that 75% of Veterans who took part in their programs felt less distress and 72% saw a reduction in pain.
The partnership between VA and Veterans Yoga Project focuses on several key goals:
- Teaching Veterans about the benefits of yoga and mindfulness for their mental, physical and emotional health.
- Making access to yoga classes and mindful resilience training easier for Veterans.
- Encouraging local partnerships between VA medical centers and Veterans Yoga Project instructors.
- Offering free yoga and meditation classes to Veterans in their communities.
Classes reduce pain and stress
“Veterans Yoga Project is proud to partner with VA and deliver yoga and mindful resilience practices as a primary service to America’s Veterans,” said Brianna Renner, CEO of Veterans Yoga Project. “As an integral part of VA’s Whole Health initiative, together we have the ability to empower more Veterans to live, thrive and actively belong. With a robust teacher network and over a hundred free yoga classes weekly, we are dedicated to growing the impact of our classes to reduce pain and stress and support as many Veterans as possible.”
This partnership shows VA’s commitment to changing the way health care is delivered to Veterans, focusing on personalized, whole-person care. Yoga is part of VA Whole Health System of Care, which gives Veterans supportive health options.
I teach the Gentle Yoga for Back Care, and alternate that time slot with Chair Tai Chi. Both have been popular with some of the older Veterans.
Now we are hosting a new class, Chair Yoga for Fall Prevention. It is Fridays at 1 PM CDT (think Texas time). Some gear is needed for this class. Two Chairs, a Yoga Strap, a Yoga Block. Optional, if you have a yoga strap with a buckle, or a TheraBand (stretchy strap).
Here’s the registration link, then you “Book” the class! https://veteransyogaproject.org/vyp-classes/
Here’s the online description of the class.
Class Description
Discover the benefits of yoga without the need to get down on the floor in our Chair Yoga for Fall Prevention class. This gentle and accessible yoga practice is designed to improve balance, flexibility, and strength while keeping you comfortably seated or standing with support.
Our chair yoga practice includes:
Seated Balance Poses: Enhance stability and coordination through modified yoga poses performed while seated.
Gentle Stretching: Increase flexibility and joint mobility with easy-to-follow stretches that reduce stiffness and improve range of motion.
Strength Exercises: Build muscle strength in the core, legs, and upper body to support daily activities and reduce the risk of falls.
Mindful Movements: Boost body awareness and confidence with slow, deliberate movements and guided breathing techniques, all performed with the aid of a chair for safety and comfort.
Perfect for seniors, those with limited mobility, or anyone seeking a low-impact exercise routine. Our skilled instructors will guide you through each pose, ensuring a safe and enjoyable experience. Embrace a healthier, more stable lifestyle with Chair Yoga for Fall Prevention!
You know Simplicity pattern company (which you can find at Hobby Lobby, JoAnns Fabrics and online) has come out with patterns for making bolsters, cushions, yoga mat bags and such, but there is a wealth of info out there on the web to help you make your own yoga props.

I made my yoga mat bag out of upholstery material. I didn’t need to use any lining material because my upholstery fabric was very thick.
Yoga Mat Bag Tutorial, like a long tote bag. I made this one.

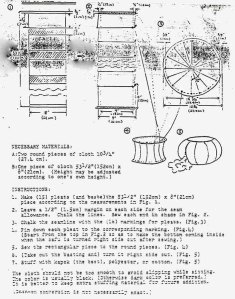
Some of the websites that listed how to make the seated meditation pillows are no longer on the web, so I’ve included the instructions onto this page. Here’s a little PDF I created based on these long ago lost internet instructions. Sewing a Meditation Cushion


Whether you’re looking for some comfortable, casual seating or want to make your meditation sessions more pleasant, a zafu and zabuton are wonderful things to have around the house. Zafu and zabuton are traditional Japanese cushions used for meditation; the zafu is a circular pillow with pleated sides, and the zabuton is pretty much just a large, flat pillow. You can order them online for $40+ each, but it’s cheaper and more satisfying to make your own at home.
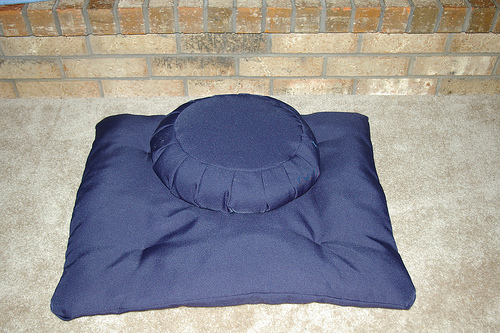


(I don’t have the best meditation posture, but you get the idea of how the cushions work. The zabuton is a little small for me, because this is one I made for a friend who’s shorter than I am.)
The zafu elevates and cushions the pelvis, and the zabuton cushions the knees and ankles. This position facilitates better posture, eases joint and back pain, and may help one achieve deeper longer meditation sessions. As long as you’re making one set, why not make two? Keep the extra set for guests, give it to a friend who meditates or has back problems, or donate it to your local Zen center or Buddhist temple.
About the materials: I chose to use a cotton/polyester blend for these because it’s cheap and easy to clean with a wet rag; these aren’t something you can just throw in the washing machine. When I’m more settled in my meditation practice, I’ll probably make another set out of some heavy silk, perhaps adding some colorful embroidery or sashiko stitching.
As for filler, I used organic pillow-grade buckwheat hulls for the zafu and plain ol’ polyester stuffing for the zabuton. Kapok would be a better choice for both, but it’s fairly expensive.
Click below for full instructions on how to make the zafu and zabuton.
Zafu
Materials:
Sewing a Meditation Cushion. That’s what I started with, but I had to tweak it a little for my own use. I recommend downloading it even if you’re going to use my instructions, as the illustrations in the PDF are quite helpful.
Cut a strip of fabric 65″ x 7″ (there are a few extra inches in the length for fudging purposes.) Cut two circles 13″ in diameter – I used a 13″ round serving plate for my template, but you could also make from cardboard using a compass and a pencil.
Pleat the long strip of fabric: measure 4.5″ inches from one end and mark. Make two more marks 3/4″ from the first. Measuring from your center mark, repeat the process every 4″ until you have 14 pleats marked. Fold, iron, and pin the pleats (since the iron setting for polyester blends usually isn’t high enough for steam, use a water spray bottle for best results.)
On the end, you started pleating at, fold back the fabric 1/2″ and iron. Begin pinning the strip of fabric around one of the fabric circles. When you get to the end, you’ll have a few extra inches of fabric. Fold back and iron. Pin your zipper in place on the folded ends of the fabric, making sure to cut and secure the zipper at least 1″ away from the top and bottom of the fabric to allow room for sewing. Use the sewing machine and a zipper foot to sew the zipper in place; hand-stitch the remaining seam of the side strip width. Trim the extra fabric behind the zipper.
Using the sewing machine, stitch the side fabric strip to the first circle of fabric with a 3/8″ seam allowance. Then pin and sew to the second circle. Trim the extra thread, remove any remaining pins, and turn the pillow.
Stuff as much buckwheat hull as you can into the pillow. This is a little tricky, as buckwheat hulls are tiny and quite devious. Also, they really hurt under bare feet. Fill it as much as you can, shake it down, and fill some more. I used almost all of the 5 lbs. of buckwheat hulls I purchased. Once it’s full, try it out. You may find that you’d be more comfortable with more or less filling – hence the zipper. (And, I’ll admit, I’m terrible at blindstitching. The zipper is my way of cheating.)
If you want to make your circles a different diameter, here is how you calculate where to place your pleats and how long a strip of fabric you need: Multiply the diameter of your fabric circle by pi (3.14159.) This will give you the circumference; for a 13″ diameter, I got a 40.84″ circumference. Add 1″ for the zipper seams (=41.84″.) For 14 pleats, each 3/4″ and using 1 1/2″ of fabric, add 21″ (=62.84″.) Add a couple of inches for fudging purposes, so you’ll be sure not to run out of fabric and have to start all over again (=65″.)
To determine where to put your pleats, take the length of your fabric strip, minus the 1″ of seam allowance and 2″ or so for fudging allowance (in my case, 62″.) Divide by 15 (=4.13″.) Round off as best as you can (=4″.) Remember to add your 1/2″ seam allowance for the measurement before the first pleat (=4 1/2″.)
Zabuton
Materials:
Cut two rectangles of fabric, 32 1/2″ x 27 1/2″ (if you’re over 6′ tall, add a few inches to both dimensions. You need it to be big enough to accommodate you when sitting cross legged with your knees comfortably cushioned on the zabuton.) Note: Cutting a straight line that long can be difficult. In order to make sure that my cuts are indeed straight, and that I end up with 90o angles, I use the pulled thread method for cutting straight lines in the fabric.
Pin the rectangles together and stitch around the edges with a 3/8″ seam allowance, leaving an opening about 4″ wide on one side for turning and stuffing. Make sure to backstitch at the corners and on both sides of the opening. If you like, you can stitch a small curve on the edges or add a rise, but it’s not necessary.
Turn and stuff. A word about polyester stuffing: it’s tempting to just grab wads of stuffing and jam it in there without a care in the world, but you’ll end up with a lumpy, unusable pillow. Take the time to do it right. Grab a handful of stuffing and pinch off little pieces. You can make a big pile of pinched stuffing and then stuff the pillow by the handful. You’ll use a lot less stuffing this way, and your zabuton will be nice and fluffy – not lumpy.
Once the zabuton is stuffed to your liking (I stuffed to about a 2″ rise,) stitch the opening shut. To keep the stuffing from shifting about too much, tuft the zabuton. I added four tufts, each about 8″ from the corners toward the center of the pillow. To tuft, take a sewing needle and an 18″ length of thread. Double your thread and pierce both layers of the pillow; pull the needle through, but leave a few inches of thread on top. Bring the needle back through both layers of pillow near the first stitch. Pull both ends of the thread tight and tie it off carefully. Clip the extra thread. And you’re done!
Other links for sewing up your yoga props
List of Sewing Patterns for Yoga Clothing and Sewing Yoga Gear
Sew your own Yoga Mat Bag Sewing Instructions

May I Be Metta Meditation
May I be well
May I be happy and content
May I be free from danger and suffering
May I be filled with loving-kindness
May you be well
May you be happy and content
May you be free from danger and suffering
May you be filled with loving-kindness
May all beings be well
May all beings be happy and content
May all beings be free from danger and suffering
May all beings be filled with loving-kindness


You must be logged in to post a comment.